
What is Decoupled Architecture?
We can understand decoupled architecture as a separation of computing components or application layers to execute independently while still interfacing/communicating with each other using API.
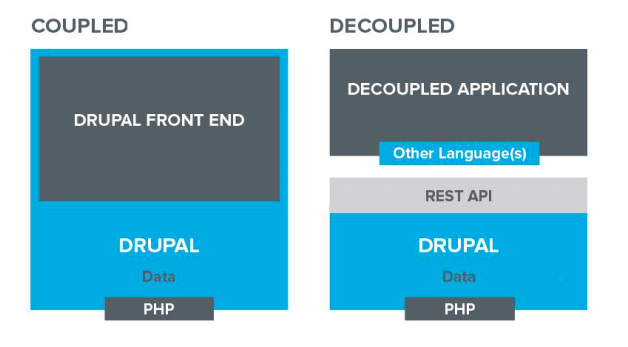
In traditional Drupal applications, the front end and back end work as a common app to deliver HTML to the client browser. However in the decoupled setup of Drupal, Drupal (As a backend app) expose data using Json Api to the frontend app, And the frontend app consumes data, processes it, and sends rendered HTML to the client browser.
Why Decoupled Architecture?
- It improves performance by minimizing requests and memory usage.
- The decoupling of services enables parallel and rapid development of app components.
- Each decoupled component/microservice has a very specific role and its own codebase and that allows better management of code.
Let’s proceed further with a decoupled Drupal setup with Gatsby.
Backend setup with Drupal.
- Download and install Drupal.
You can also use the composer command to download Drupal given here https://github.com/drupal-composer/drupal-project - Enable JSON:API core module.
You can also use the following command to enable that module.drush en jsonapiIt automatically installs dependent modules
Docs:- https://www.drupal.org/docs/core-modules-and-themes/core-modules/jsonapi-module - Create some demo articles.
Frontend app with Gatsby.
- Install the gatsby command line interface globally with the following command.
npm install — global gatsby-cli - Now, start a new project for the front end with the following command.
gatsby new PROJECTNAME - Install the following image packages for fetching an image from Drupal
npm install — save gatsby-image, Also if not already installed, Install the following packagesnpm install --save gatsby-transformer-sharp gatsby-plugin-sharpand add the following lines to gatsby-config.jsplugins: [`gatsby-transformer-sharp`, `gatsby-plugin-sharp`] - Install gatsby package for Drupal source.
npm install — save gatsby-source-drupal
and add the following code to gatsby-config.js
plugins: [
  {
    resolve: `gatsby-source-drupal`,
    options: {
      baseUrl: `http://drupalsiteurl.com`,
    },
  },
]
Now, run the development server using gatsby develop , you can visit http://localhost:8000/ to review your setup.
Prepare the GraphQl query and show data on the listing page.
Navigate to http://localhost:8000/___graphql to prepare the GraphQl query for fetching data.
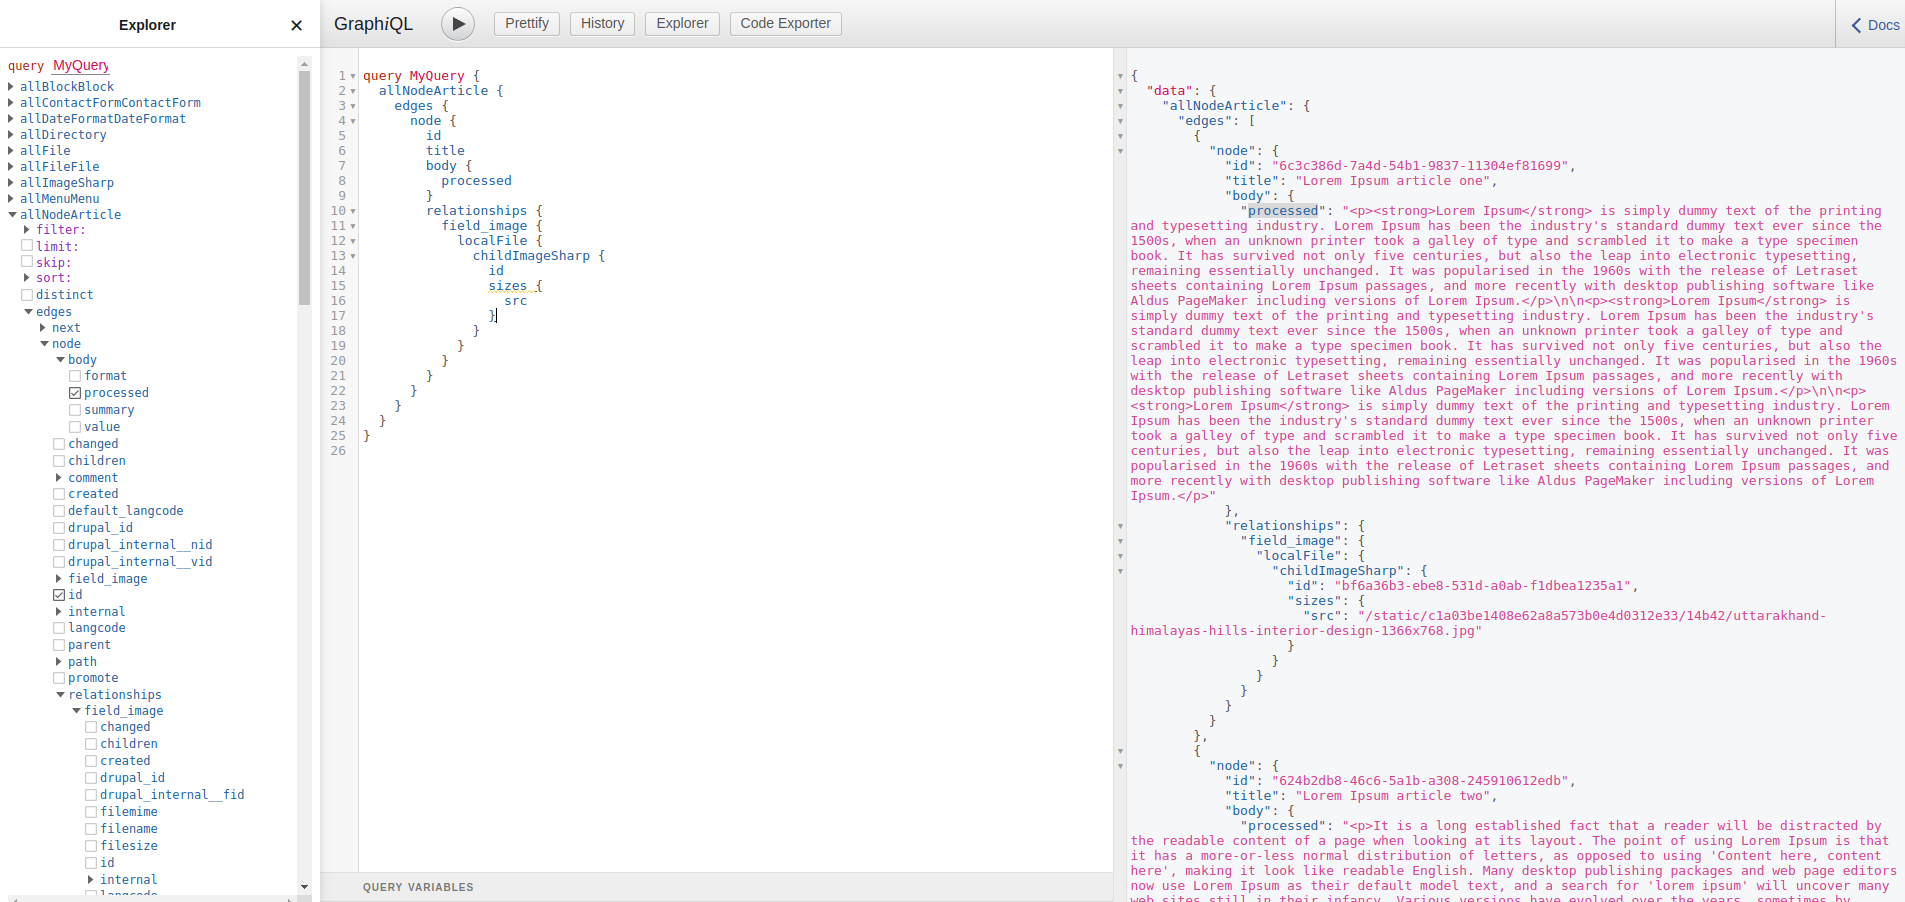
Now edit index.js to show our blog article, we also need to include the above GraphQl query on our page.
// File:- src/pages/index.js
import React from "react"
import { Link } from "gatsby"
import Layout from "../components/layout"
import SEO from "../components/seo"
class IndexPage extends React.Component {
    render() {
        const blogArticles = this.props.data.allNodeArticle.edges.map(
          edge => edge.node
        )
        const ArticleCard = ({article}) => (
          <div
            style={{
              display: `flex`
            }}
          >
              <img src={article.relationships.field_image.localFile.childImageSharp.sizes.src}
                style={{
                  width: `100%`,
                  height: `auto`,
                  maxWidth: `280px`,
                  marginRight: `15px`
                }}
              />
              <div>
                  <h2>{article.title}</h2>
                  <div dangerouslySetInnerHTML={{ __html: article.body.summary }}></div>
                  <Link to={`/article/${article.nid}`}>Read More</Link>
              </div>
          </div>
        )

        return (
          <Layout>
            <div style={{ overflow: `hidden` }}>
              <div>
              <SEO title="Our Blog" />
              {blogArticles.map(article => (
                <ArticleCard
                  article={article}
                  key={article.nid}
                />
              ))}
              </div>
            </div>
          </Layout>
        )
    }
}
export default IndexPage
export const query = graphql`
  query blogQuery {
      allNodeArticle {
        edges {
          node {
            id
            nid: drupal_internal__nid
            title
            body {
              summary
            }
            relationships {
              field_image {
                localFile {
                  childImageSharp {
                    sizes {
                      src
                    }
                  }
                }
              }
            }
          }
        }
      }
  }
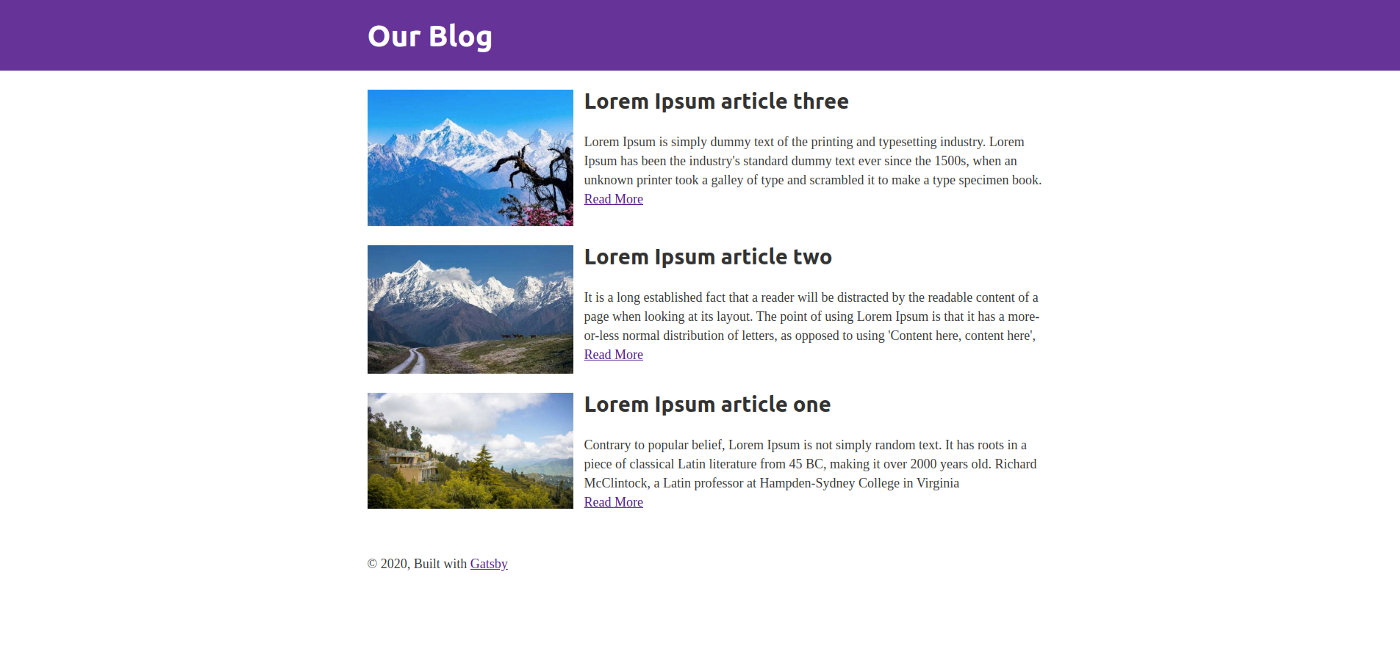
Compile the source again and we are done with our listing page.
For dynamic routing, we can use gatsby.node.js and develop further pages of our site.
There are also several starter packs are available for gatsby and Drupal 8 on GitHub, we can also utilize them for rapid development.
However, I will take a break here and hope you like the article.
Thank you.