
Before jumping to the actual steps let’s review some important aspects which will help us to decide whether we need this setup since we have to maintain those aspects till the end.
- Availability — Ensuring high availability architecture as well as network stability.
- Cost — Extra equipment cost, Electricity & other bills
- Security — Firewalls & regular security check-ups.
Okay, let’s start with the prerequisites.
Step 1:- Prerequisites
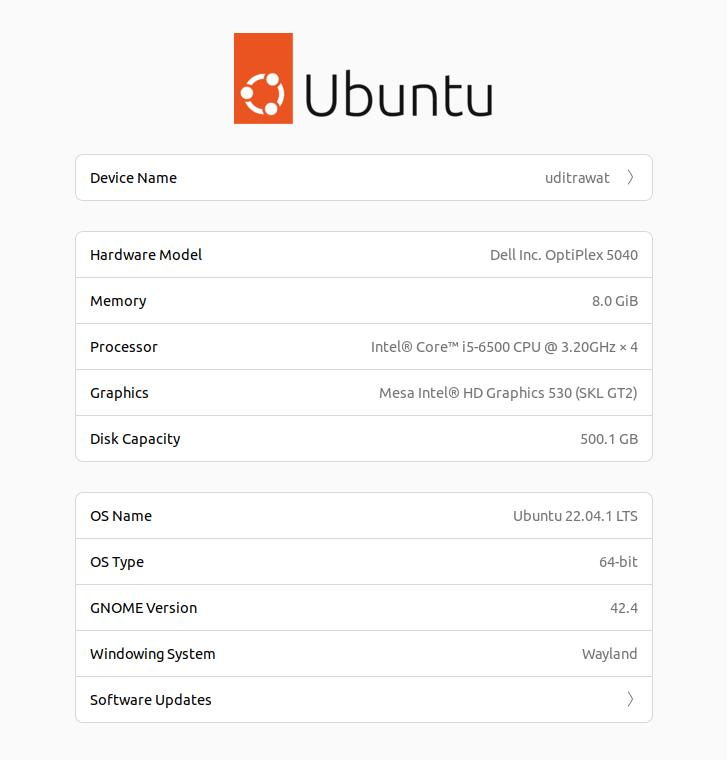
I am listing my computer & network configuration as prerequisites. It can vary according to need.
- Operating System — Ubuntu 22.04 LTS
- Processor — Intel® Core™ i5–6500 CPU @ 3.20GHz × 4
- Memory — 8 GB
- Disk Capacity — 512 GB SSD
- IP — Static IP
Step 2:- Virtual Host Configuration
I started by setting up my website locally with the exact domain name.
https://www.digitalocean.com/community/tutorials/how-to-install-linux-apache-mysql-php-lamp-stack-on-ubuntu-22-04
- Installed Apache, MySQL, and PHP.
- Set up a virtual host.
- Set up my Drupal site.
- Followed security best practices.
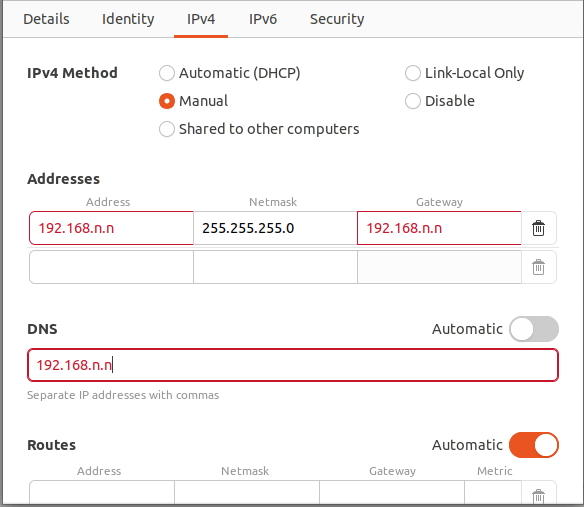
Step 3:- Network Configuration
I updated my network configuration to connect with the local static IP.
- Open the network configuration and update the settings there as shown in the below image.
Step 4:- Enable Port forwarding
https://www.debuntu.org/how-to-redirecting-network-traffic-to-a-new-ip-using-iptables/
- Enable IP Forwarding:
sysctl net.ipv4.ip_forward=1 - Add your forwarding rule:
iptables -t nat -A PREROUTING -p tcp -d 10.0.0.132 --dport 29418 -j DNAT --to-destination 10.0.0.133:29418
here is 10.0.0.132 is your public IP. - Ask IPtables to Masquerade:
iptables -t nat -A POSTROUTING ! -s 127.0.0.1 -j MASQUERADE
Step 5:- Set Up a Firewall with UFW
https://www.digitalocean.com/community/tutorials/how-to-set-up-a-firewall-with-ufw-on-ubuntu-22-04
- Enable UFW
sudo ufw enable - Allow Apache, Port 443 & Port 80
sudo ufw allow in “Apache Full”sudo ufw allow 443sudo ufw allow 80
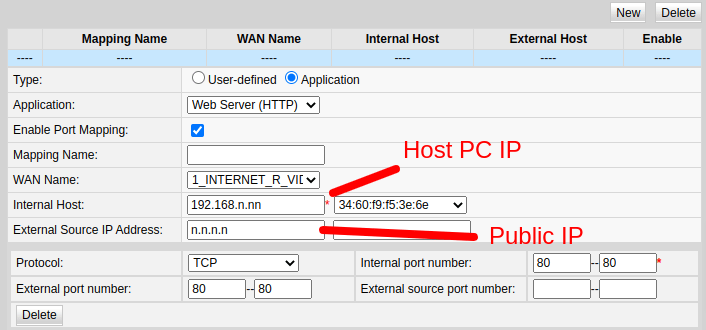
Step 6:- Router configuration
- Add the forwarding rule as shown in the below image, I am using a Huawei router, and settings can vary for other origin routers.

Step 7:- DNS Setup with Cloudflare
I purchased a domain name from Godaddy but I wanted to enhance security so I used Cloudflare (a free account) over it.
- Log in to the Cloudflare dashboard.
- Click on “Add a site”.
- Provide your domain name and click “Add site”.
- Now Cloudflare will set up all the DNS records and will provide some nameservers.
- Update provided nameserver to GoDaddy account.
- Now add an A record to your Cloudflare account as shown below.

Click on save and that's it. Your website will be available on the internet.
It’s a nice experience and I have learned many things during this process, but it is an expensive alternative if we just want to host a website. I suggest purchasing shared hosting if you want to host a blog.
There are a few other things like the PC needs to be up and running every time and this will increase our electricity consumption. It needs to have very good connectivity to the network and we might need to buy some equipment for it (I purchase a high-gain TP-Link adapter for it). We also need a static IP which will increase the per month cost of our internet bill. (We can also do it with dynamic IP, I will cover that in the next article).